Showing posts with label photoshop. Show all posts

Sunday, November 4, 2012

First Time Trying Focus Stacking (Muir Woods National Monument)

I recently took a trip to both Muir Woods National Monument and Sausalito (pretty close together). That day at Muir Woods National Monument, I tried to do focus stacking when I noticed I can't get everything in focus when I wanted to get close up to the mushrooms growing in the park. I am here to show you the results I got! :) I used my Canon 600EX-RT in all of these photos along with a Fotodiox Softbox. If you want to see the rest of my Muir Woods National Monument photos, you can do so here. If you want to see my Sausalito photos, you can do so here.

The mushrooms you see in this blog post are called Turkey Tail Mushrooms (Trametes versicolor). The mushrooms are not poisonous and are edible. It has been used for a very long time in herbal medicine to help boost the immune system and help prevent/treat cancer. Clinical studies have shown this mushroom does help kill off cancerous cells and help a person recover.

Second introduction here is on focus stacking. If you are a pro and know what focus stacking is, great! If not, let me teach you. If you are just learning photography, you should know the amount of stuff you can get in focus, decreases as you get closer to the subject. The amount of things you can get focuses is called your depth-of-field. The farther away you are from the subject, the more you can get in focus in front of it and in the back of it, the closer you are to a subject, the less you can get in focus. To help you understand this, I actually have a Youtube video on depth-of-field that you can watch here. Sadly, this means that the closer you get, the less of your subject will be in focus! So how do you get the whole thing to focus? You take multiple shots at different focuses and combine them later in Photoshop! I'll teach you how to do this at the end of this blog post.

Full Resolution Photos and Prints: If you want to see full resolution photos or buy prints of any of the photos you see, they are up on my portfolio for viewing. To see my best Muir Woods National Monument photos for 2012, use this link. To see my best Sausalito photos, use this link. To see all of my photos from this trip, use this link.

 I think this is the best photo I took at the park.

The tree stump of a fallen tree. Sure a lot of mushrooms!  

Some mushrooms and moss growing on a tree.

These are all the focus stacked photos I took at Muir Woods National Monument, and like I said above, I will teach you how to do this.

Settings on your camera:
  • Aperture Priority (Av or A)
  • Narrow aperture
How to take your photos for focus stacking:
  1. Plug a remote shutter release into  your camera and set your camera on your tripod. Make sure it is far enough to focus on the closest part you want to focus on! If you are using a flash, try to set it on a light stand or hold it steady. Moving the flash slightly between shots is fine. 
  2. Take a photo, focus a bit farther, take another, and continue to do this until you get all the parts you want in focus. 
How to combine them in Photoshop:
  1. If you did them in RAW, drag all 3 into Photoshop and process them in the same manner, then open them up in Photoshop. If you did them in JPEG, go ahead and just open them in Photoshop. 
  2. File >> Scripts >> Load Files into Stack... >> Add Open Files (Make sure "Attept to Align Source Images" is checked) >> OK
  3. Select All Layers in the Layers Panel
  4. Edit >> Auto-Blend Layers >> Check Mark "Stack Images" and "Seamless Tones and Colors" and press OK
  5. After Photoshop is done, make sure you crop out some of the borders that show up on the side (due to the different focuses), and then save and you are done! 
I hope you have enjoyed the photos and the tutorial! I will be posting the other photos I took on this trip soon, and the links will be at the top of this blog post. Please don't forget to share my blog posts with your friends! If you would like to get notifications next time I post, you can "Like" me on Facebook or follow me on Twitter and Google+. These links can also be found on the top of the right sidebar.

See the rest of my Muir Woods National Monument photos here. See my Sausalito photos here.

Friday, September 28, 2012

High Speed Photography Tutorial (Including a Video Version)

Space Shuttle Endeavour Flyover at NASA Moffett Field near Mountain View, CA.
See more photos of the event here.

How would you guys like to learn high speed photography and be able to take a photo like the one I did above? Pretty sure all of you do. I am here to offer some tips and tricks on the method I use for high speed photography. Let's get started!

In order to take the photo, you need to have the correct settings on your camera. Here are some of the settings I use on my camera. I'll explain them in more detail under the image. These were just screenshots pulled out of my video. If this text version tutorial don't make that much sense to you, I recommend you want the video at the end of this blog post.

  1. In a high speed shot, you always want to control the speed of the shot. Always use Shutter Priority Mode (Tv or S) on your camera. In this mode, you can set the camera's shutter speed, and have your camera decide the rest of the values (ISO, Aperture) automatically to reach the correct exposure. You do this by using the mode dial on the top of your camera. 
  2. Secondly, make sure you have a shutter speed fast enough for your moving object. However, you should not drive this speed up too much as your camera may not be able to get the right exposure! Generally if the camera can not reach the correct exposure, the values in the camera will flash. Generally when this happens, it means your photo will turn out too dark, however under some circumstances, it may mean your photo will turn out too bright. This is generally a trial and error process. The tip here is to get it at the "right" exposure, one that is neither too short or too long. I can not give you a specific shutter speed as it will depend on how fast your subject is moving. 
  3. Set your camera in AI SERVO mode (Canon) or in the special focus tracking mode in your camera. This mode is generally under different names in other brands of cameras. I only know the name for Canon cameras as I have never used other brands before. AI SERVO will insure that your subject will be continuously focused on as long as you are pressing down the shutter button half way or in between shots when it is fully pressed down. 
  4. Set your camera on High-Speed Continuous Burst so it will take as many shots as fast as it can when the shutter button is pressed down. This will make it more likely you will get the shot you are looking for. 
  5. Zone-AF is what I use for these kinds of photos. The center focus points of ANY camera is the fastest and is great for focusing on fast moving objects. Most likely, your subject will be in the center anyways, so why not just limit the focusing to those points! 
  6. Setting the metering mode to center weighted average will help you get the correct exposure. Sometimes when you try to take a photo of a bird in flight, the sky behind will be extremely bright compared to the under side of the bird. If you left it on evaluative metering, your camera will most likely expose for the sky instead of your subject. Again, your subject will be in the center most likely, so this will even out the exposure a bit and help you get the right image. 

Some people may disagree with the tips I provide below. Again, this is just my way of doing things. Whether or not you want to follow these is completely up to you. 

Another thing I like to do is setting my camera on RAW + Small JPEG. I love shooting RAW as I have more work room in post processing, and I also shoot a small JPEG because RAW photos can not be previewed with out special softwares like Photoshop. Generally people look down at this for high speed photography as it will fill the buffer (temporary storage) of your camera as it writes the data to memory card. When this limit is reached, your speed will slow down significantly and your camera will refuse to take any more photos. How fast you hit this limit depends completely on the camera you have and the write speed of your memory card. If you want to see how fast before the Canon EOS 7D hits its buffer, check out my video below. The Canon EOS 7D has a pretty fast processor and a fairly large buffer inside so I shoot in RAW as the buffer limit don't bother me as much. 

If your camera hits the buffer too soon and it starts bothering you, you can try these few things:
  • Turn off the JPEG "preview".
  • Choose a lower resolution RAW format.
  • Switch to JPEG format (you usually can't fill your buffer in JPEG mode).
  • Buy a faster memory card or camera. 

The other thing you see in my above image is that I have my camera set on ISO Auto. If you are a bit more experienced with photography, you might be thinking, "That is not very professional!". Usually I'd agree with you, but however, the recently Canon EOS 7D firmware upgrade added the option for me to set a max in ISO Auto. If you want to read more about the firmware update, you can read about it here. You want to use as low of an ISO as you want, but with fast moving objects, there is no telling what you need to use. It is best to let your camera automatically pick between a limited range. I usually don't like to go over ISO 800, but in the Space Shuttle Endeavour Flyover case, I know ISO 400 should be enough to properly expose the shots. In photography, everything is about experience. You should be able to get a rough estimate of the settings you need for a particular image with out even seeing it first. Only tip I can offer you on that is keep taking photos and soon you will get the hang of it. To configure the maximum ISO on a Canon EOS 7D, press (Menu), and scroll to the 3rd menu. You should see this option. If you don't, you probably didn't update your camera yet, and again, you get get more details on that here.


I love these settings, and I wish to use them more often! What should I do? You can easily set it to one of your custom function modes on your camera (may not be present on some cameras and the number of modes you have vary between different bodies too). The method I show you here is for the Canon EOS 7D as this is the only camera I have and know how to use. Different cameras may have different methods of setting this up, or you may not have custom functions entirely. I recommend you consult your camera's instruction manual for more details on this subject.

If you have a Canon EOS 7D like me, you are in luck! Ever wondered what the C1, C2, or C3 on your mode dial is for? It stands for Custom Function 1, Custom Function 2, and Custom Function 3. On your Canon EOS 7D, you can set up a total of 3 custom functions. For me, I my C1 set on the settings for HDR photography. For my C2, I have it set up on landscape shot without a remote shutter release (in other words 2 second delay). For my C3, you have been looking at it all this time and it is my high speed photography settings.

The settings can be any mode you want (expect Auto and Creative Auto). The button can be P, Tv, Av, M, or B and any custom settings you dial in will be saved. Custom settings includes your menu options, your metering modes, your shutter speed (in Tv or M mode), and all the other things displayed on your LCD. Every time you turn to the Custom Function, all those options will be there set up for you the same way you did the first time. To do this, turn your mode dial to the mode you want (P, Tv, Av, M, or B) and dial in the settings. Then just press (Menu), scroll to the 9th menu, and go down to Camera user setting (as demonstrated in the photo above). Then it will ask you to either Register, or Clear Settings. You will want Register (obviously). Then you just pick which mode dial you want to set it on. Doing so will reset what ever you have set on that mode previously, so make sure you don't pick the wrong one!


Now that we are done with camera settings, let's move on to some methods I use in the field when I'm actually taking photos.

The first tip I offer you may not be practical in all situations. Sometimes you maybe wondering if the shutter speed you set is fast enough, or if the tracking modes is correct. In planned events, like the Space Shuttle Endeavour Flyover, I know the subject will be a Boeing 747 (airplane). Before the main target flew over, I saw some other airplanes flying over the area and I took some test shots with those planes. You can see the test shots I took below.


Generally this is not practical with wildlife photography because those things are not planned and the speed they move at varies too greatly. However, in these planned events, I know those airplanes flying overhead is traveling at about the same speed as the Boeing 747 later, so I was able to use them as test targets. If you expecting the subject to fly over sometime, and it is totally planned, I recommend you find some test objects traveling at about the same speed before the real deal comes.

If you are in the field getting wildlife photos, it is a process of trial and error. Again, like I said above, The more photos you take, the easier it is for you to judge the correct shutter speed.

Remember how I said above with your buffer filling up? One way I try to avoid that is by shooting 2-3 shots, and then taking a break. I still keep the shutter button half way pressed, and I still track the subject, but I take a break from taking any shots. If you think about it, later on your computer, you only need 1 or 2 good shots. You don't need several hundred trashy shots (even if they are all in focus). So when I take a break between the shots, it gives the camera more time to write the data to the memory card, it gives me time to reframe the shot (You can't see anything when the mirror is up!), and it also gives AI SERVO some time to refocus accurately. Technically AI SERVO is still focusing between the shots, however it will be much more accurate when it doesn't have the mirror flipping up and down.

If you looked at my Endeavour photos, you will know I left some margins in every photo. I recommend you do the same just incase you have to crop and reframe a photo. This will also give you some error space as well. As I mentioned above, you can't see through your view finder when the mirror is up! Sometimes I will find myself not panning my camera when the mirror is up! I am not the only one who make this mistake, so make sure you leave some margins when you frame up the shot. Also remember to continue panning even when the viewfinder goes dark.

Alright, I hope you have enjoyed this tutorial! I hope this tutorial can help you out with your future photos. Please don't forget to share my blog posts with your friends! If you would like to get notifications next time I post, you can "Like" me on Facebook or follow me on Twitter and Instagram. These links can also be found on the top of the right sidebar. Alright, and below is a video version of this tutorial which may further clarify somethings if you didn't get it in writing.


If you enjoy the video and would like more, you can subscribe me on Youtube here

Copyright Warning: The first photo in this blog post is one of my best and most popular works of art. Unauthorized usage and reproductions are strictly prohibited. Please contact me here to purchase prints and negotiate photo licenses.

Sunday, June 17, 2012

Arroyo Del Valle Trail HDR Landscapes

These are HDR landscape shots of the (partially dried) stream on the Arroyo Del Valle Trail (the one I usually call Pleasanton Trail). Arroyo Del Valle Trail is located in Pleasanton, CA. It is a very long trail, and one of the entrances is near my house. I exercise and take photos there often. The photos were combined and touched up using Photoshop. The photos were taken at f/22.

Full Resolution Photos and Prints: If you want to see full resolution photos or buy prints of any of the photos you see, they are up on my portfolio for viewing. To see my best Pleasanton photos of 2012, use this link. To see all of my Pleasanton photos of 2012, use this link.

View from the bridge towards the direction of Hopyard Road.
This was my best photo that day. the sun was not blocked by a cloud when I took this photo. 

View from the bridge toward Highway 680.

 View from Highway 680 towards Hopyard. You can see the bridge in the distance. 
The lighting in this photo was the worst. :/ The darker area in this photo were really really dark before. That is the power of Photoshop! HAHA Took me an hour to mask and adjusting the lighting to get this result. 

Remember the bridge photos I took last time? You can see them in this blog post. Anyways, I thought it would be nice to experiment with HDR photography, and the scenery on the trail is great. So this is all the photos for today. Please share the blog post with your friends and family! I'll see you guys next time.

Sunday, June 10, 2012

Augustin Bernal Park HDR Landscapes

This was my first time trying out HDR photography, and I know some of the results are not that good. :) But I hope you enjoy the photos! The photos were taken in RAW and later combined using Photoshop. In the photos you will be looking at an overhead view of Pleasanton/Dublin. Augustin Bernal Park is located in Pleasanton, California.

I hiked all the way up to the peak of the mountain to take photos of this. It's good exercise. LOL But it was so windy that day! There were like 30 MPH winds on the peak. :/ And I stayed there for 10 minutes taking photos. I got a slight cold afterwards. Oh well, I hope you enjoy the photos.

Full Resolution Photos and Prints: If you want to see full resolution photos or buy prints of any of the photos you see, they are up on my portfolio for viewing. To see my best Pleasanton photos of 2012, use this link. To see all of my Pleasanton photos of 2012, use this link.

Almost up on the peak, there is a giant flat area filled with weed and trees.  

A tree and a picnic bench on the peak of the mountain. There are some what I believe is cell towers on the higher peak.

Just as a reminder, if you love my blog, you can also "Like" us on Facebook. You can also do that in the Facebook box at the top of the right sidebar. This will give you updates on your Facebook feed as I post more photos.

Another view of the flat area. (Heading down due to the wind.)

Landscape of Pleasanton/Dublin. Pleasanton is closer, Dublin is off in the distance (I think). 

Another landscape shot from a different angle.  

This photo took me the most time in Photoshop as the trees in the foreground did not turn out so well. Took me a long time to mask and brighten it up. :/ I went hiking a bit late that day so the lighting was not that good either. 

This is all the photos for today. I hope you have enjoyed viewing them! Please don't forget to share the blog post with your friends! Also, if you want to get notifications when I post up more photos, "Like" us on Facebook or follow me on Twitter and Instagram. These links can also be found on the top of the right sidebar. Thanks for looking! See you next time!

Saturday, January 7, 2012

Lake Tahoe 2011 Part 3

I recently went to Lake Tahoe for vacation. Took some photos. :) There wasn't a lot of snow this year though. The weather patterns have been really weird recently. Anyways. I hope you enjoy the photos!

Lake Tahoe is a large fresh water lake in the Sierra Nevada of United States. It is located on the state line of California and Nevada. The lake is 1645 feet deep making it the second deepest lake in the USA (#1 is Crater Lake in Oregon). Lake Tahoe is a major tourist attraction in both California and Nevada. It is home to a number of ski resorts, summer recreation areas, and other tourist attractions. The Nevada side also includes high amounts of casinos which also attracts quite some people.

Full Resolution Photos and Prints: If you want to see full resolution photos or buy prints of any of the photos you see, they are up on my portfolio for viewing. To view my best photos from Lake Tahoe and Truckee in 2009 and 2011, use this link. To view all of my photos from this trip, use this link.

Part: 1 | 2 | 3 | 4 | 5 |

Today's post will mainly focus on landscape. Most of my good photo is in today's post. Hope you enjoy!

An effect like this can only be achieved with a circular polarizer. The one I own is a B+W 58mm Kaesemann Circular Polarizer. This photo was barely touched up in Photoshop. The colors on here are almost original. The only change was +3 on Vibrance.

The grass and bushes on the bottom of the photo acts as an "eye catcher" for the photo. If you were to just take a photo of the blue water, the photo will be too blue. The bushes on the bottom helps balance out the blue in the photo. To have everything in focus, it is also a good idea to put your camera in aperture priority mode and close down the aperture (high f-stop). The camera was pointed downwards on a hill to take this photo, so the water is farther away than the bushes in the foreground.

Photography Tip: Circular polarizers are great for getting rid of reflections from water and glass. It can also help saturate colors. It is especially useful for taking photos of things underwater (while you are above water) and landscapes. If you are serious about photography, try not to aim for the $10 or $20 ones. They will leave you with horrible glares. The B+W Polarizer I have costed me around $105.

A photo of Lake Tahoe. Remember the "eye catcher" trick I showed you yesterday? The rocks here act as an "eye catcher". Compare this photo to the next photo.

I zoomed in a bit and took out the rocks. See how this photo now looks average? It is good to have an "eye catcher" in your photos.

This effect, again, can only be achieved by a circular polarizer. Apart from your lens, a professional will always tell you that it is good to keep a variety of good filters on hand to achieve different effects.

This is another photo of Lake Tahoe. This is one of my good photos in my mind. See those 3 rocks? Those also act as the "eye catcher" for the photo. Like I said before, even if the photo is of landscape, the eyes still tries to look for something to look at in the photo. If they eyes don't find anything, you will feel like it is an average photo. When compositing a shot, always look for eye catchers for a beautiful photo.
Update 2/22/2016: I visited this place again recently, and unlike my 17 year old self, I actually took note of where this actually was. This photo is shot at at Kings Beach, CA.


Another photo of Lake Tahoe.

Stopped by the side of the highway and took this photo. The area looked more beautiful the the photo. That is what I mean "eye catchers". I couldn't find any.

Taken on the side of the highway.

Lake Tahoe's view from the peak of the mountain. Taken on the side of the highway. You know what the funny thing is? I think several years ago, I took a photo from the exact same place. The trees grew a lot! Take a look at my post from a few years back.

This photo was taken at a view point. 

I got more landscapes coming your way in the next blog post, so make sure you check back! Please share today's post with your friends and family! Also, please "Like" us on Facebook and get notifications when I post new photos!


Next Post >>
<< Previous Post

Thursday, December 8, 2011

Red-tailed Hawk (Buteo jamaicensis)

Today I got some photos of what I believe is a Red-tailed Hawk (Buteo jamaicensis). If I'm wrong, please correct me. The hawk was spotted on the Pleasanton Trail in Pleasanton, California. So I was taking a walk on Arroyo Del Valle Trail, almost at dusk (that is why the photos look a bit grainy), when I saw a giant bird land on a tree about 500 feet away from me! I quickly zoomed in onto it my camera, and took several shots. Then I kept my focus on it just in case it wants to fly off, but it didn't. So anyways here are the photos I took of it. All these photos was taken using Aperture Priority at 5.6 /f with spot metering. The photos were cropped and watermarked in Photoshop, but not touched-up.

Full Resolution Photos and Prints: If you want to see full resolution photos or buy prints of any of the photos you see, they are up on my portfolio for viewing. To see my best photos of Pleasanton in 2011, use this link. To see my best photos of bird photos from 2011, use this link. To see all of my photos from Pleasanton in 2011, use this link.

You know what came to my mind when I first saw this photo on my computer? The creepy eyes are staring at you... XD

Good birdy. I was hoping it was going to fly off and I'd get a good photo, but it didn't. Sadly. :( I guess its nest was there, it was pretty late. All the birds were going home.

Final photo of this bird. My other photos had the wrong focus, so I didn't post them.

That's all for today! I still got squirrel photos, bird photos, and Redwood Alliance photos to come! Make sure you check back! Oh yes, I almost forgot, once I get a photo of the full moon, I will be posting those up too! They turned out very very nice! Hope you liked today's post! See you next time. Don't forget to share with your friends and "Like" us on Facebook!

Oh yes, I almost forgot, I recently bought a Nikon Micro Fiber Cleaning Cloth and a Giottos Rocket Air Blaster, I will be writing a review for them on this blog in a few days. I tell you, if you are serious about photography, those two things are a must have! They are cheap and gets your lens cleaned as good as new! I just got it and used them to clean my lens. They were free of fingerprints and dust in a few seconds! If you already have these, use my method of blow, wipe, and blow. Works really well. Please remember to check back for my review! :)

Wednesday, December 7, 2011

Tips on Winter Photography

Photo taken near Reno/Lake Tahoe in Nevada.

It is winter again, and you know what that means! Lot's of gift giving, shopping, and an extremely jolly time of the year. In some parts of the world there will be snow and lot's of it! It is the time of year where people go skiing, snowboarding, playing in the snow, and for photographers, snow photography! One issue a lot of photographers get into while taking pictures of snow is the "Greying Effect". See the photo below if you don't know what it is. The "Greying Effect" ruins a lot of photos, even for people who are not photographers! So now your question is probably how do I get my photos to look like the one above instead of the one below? In today's post I will offer you some tips on how to prevent the "Greying Effect" and some other tips on how to protect your camera equipment while you are out in such a cold environment.

The left show the "Greying Effect", the right shows how snow should look like. Big difference right?

So why does the "Greying Effect" happen? To effectively teach you how to get rid of this problem, I will need to educate you on why it happens. So usually when you take a photo, your camera weighs in the different colors and light of the scene you try to take. When you try to do snow photography, most of the light coming into the camera will be white. So the problem actually happens here, when this much white light enters the camera, the camera will think you are trying to take a picture of an extremely over-exposed 18% grey object. So the camera tries to compensate it by lowering the exposure, hence making the snow grey! There are several ways to fix this problem.

Disclaimer: You follow these tips at your own risk! The author of the blog is not responsible for any damages that may result from these instructions. These tips are provided for educational and informative purposes only. 


Exposure Compensation
This might not be available to some of the more low end cameras, but is the most effective in preventing the greying effect. So first of all, you will need to put your camera into a mode where you are allowed to adjust the exposure compensation number. Then you will need to locate the option on your camera, usually marked with an icon that shows a black and white square with a + and - sign in it. Now increase the exposure compensation and take a shot, do this until the image looks satisfactory and the "Greying Effect" has disappeared. Generally you will have to increase the exposure compensation by +1 or +2 to compensate for the camera's under-exposure.

Beginner explanation on why this works: Since the "Greying Effect" is caused by your camera underexposing your image, by putting your exposure compensation at +1, this tells your camera, what ever exposure the sensor tells you to use, add 1 on top of it.

Open the Aperture
Another method, although I would not highly recommend it as this method will definitely put some blur on your image, is to use aperture priority (Av or A) or manual (M) and open up the aperture by 1-2 f-stops and then compensate exposure for +1 to +2 stops. By opening up, you compensate for the prolonged exposure time. This feature might not be available on some low end cameras.

Use a Snow Scene Mode
For a change, this feature may not be available on some of the high-end cameras (LOL). This method is very amateur-ish and not needed by professionals. Also, this method I do not highly recommend as it may overexpose some of your photos. You can do this by setting your camera to a "scene" mode specifically designed for snow. This may fix the "Greying Effect", but may also overexpose your photo, I recommend my first 2 methods.

Fixing Your Old Photos in Photoshop
Those are the methods for preventing the "Greying Effect". So now you are probably wondering, what do I do now with my old ruined photos? Throw them away? No need to fear, Photoshop will come to your rescue. It doesn't matter whether you shot it in RAW or JPEG, just raise the exposure of your shot by around +1 stop and save.
    Protecting Your Camera and Equipment In Cold Climates
    Those are the tips for preventing the problem, now let's move onto how to protect your camera equipment in cold weather. Don't think this is easy, because it is not! One mistake can ruin your camera and lens! These tips are more targeted towards DSLR owners, not so much for you guys with a small point-and-shoot.
    1. First rule, I know it is easy to forget, but don't put your camera under your jacket in a cold climate. When moving your camera from a cold place to a warm place, or vice versa, condensation may gather on your lens (including the inside), and it may damage your equipment! When going from a cold place back to a warm place (like hotel), before you go back, make sure you take out your battery and memory card, then put your camera back in the bag. After you arrived at the hotel, leave your camera in your bag for at least 2 to 3 hours before you open it up. If you don't have a camera bag, use a Zip-lock bag. Make sure you take out your battery and memory card before you go back so you don't get tempted to open up your camera bag before the camera is allowed adequate time to warm up. The 2 to 3 hour rule usually works for people who are going to Alaska or place with similar climate. If you are going to Reno like me, 1 hour tops because it isn't as cold and your camera will warm up or cool down faster. 
    2. Warm up your battery. A warmer battery will work longer than a cold battery due to the chemical reactions (I think). So for professionals, some people will keep and extra battery in their pocket to warm it up, and then they will keep switching the batteries to get more life out of it. Make sure you don't keep change in the same pocket though, I seen a comment on another blog of a guy accidentally shorting out the battery and burning a hole in his pants...
    3. And as for tip number one, try not to use the heater in your car, just wear more clothes. I think I explained it pretty clearly in tip 1 why, so not going to do it again. Another way, put your camera in a cooler, so it stays the same temperature as when you put it in, then when you need to take a photo, you can just take it out of there. 
    4. If you are going to Alaska or a place of similar climate, try not to exhale onto your camera, your breath will instantly become a thin layer of frost!
    Well that's all the tips! I hope you have enjoyed the tips on winter photography. Please don't forget to share this article with your friends and leave a comment! Also please don't forget to "Like" us on Facebook or follow me on Twitter and Google+. You can also do that with the box on the top of the right sidebar. Have fun with snow photography! Merry Christmas and Happy New Year!

    Sunday, December 4, 2011

    Pitch Dark Deer Photo

    So anyways, I did go to Redwood Alliance the other day (for one afternoon). It's this Christian campground retreat thingy in Occidental, CA. My mom wanted to hear a speech, and I agreed to tag along mainly because I knew it was on a mountain and I guessed I could get some really nice photos there. So anyways, on the way home, I saw two deers on the side of the road. It was about 9 o'clock and it was pitch dark on the highway. I knew it was too dark to take a photo, but I decided to take a shot at it. Using my camera's built in flash, and about 10 seconds while the camera sensor tried to auto focus, I got a shot of the deer. I know the following picture doesn't look like much, keep reading. :)

    Full Resolution Photos and Prints: If you want to see full resolution photos or buy prints of any of the photos you see, they are up on my portfolio for viewing. To see my best photos from Occidental, CA, use this link. To see all of my photos from Occidental, CA, use this link. To see my best deer photos, use this link.


    Due to my camera's slowness at night, I only managed to get a picture of the deer's butt... Sadly. XD So after some touching up in Photoshop (auto adjustments). Take a look at the result!


    Surprising isn't it?! That's the power of Photoshop people! :P Anyways, as you can see my built-in flash did nothing but illuminate the signs, did little for the deer. I was very surprised that Photoshop managed to restore a lot of the colors! I didn't even see that much! All I saw was almost pitch darkness! HAHA I will post the Alliance Redwood photos in a few days! :)

    Anyways here is an update (12-16-2011), I have posted up the rest of the photos I took at Alliance Redwoods. Here they are:
    Anyways here is a some more info on the configuration I used:
    Camera: Canon EOS 7D
    Lens: Canon EF-S 18-55mm f/3.5-5.6 IS
    Mode: Aperture Priority
    Aperture: f/4.5
    Shutter Speed: 1/60
    Focal Length: 32mm
    ISO: 300
    White Balace: Auto

    Monday, September 27, 2010

    A trip to Yellowstone/Grand Teton National Park (Part 1)

    Hello! This is the pictures of my trip to Yellowstone/Grand Teton National Park. Not all pictures are of the inside of Yellowstone/Grand Teton National Park. I visited Idaho Falls, Mormon Church in Salt Lake City, and some other places along the way. :) So please enjoy! 

    你好!这就开始我的黄石公园照片了。不是每个照片是黄石公园的。我还去了很多路上的地方。请欣赏。

    Full Resolution Photos and Prints: If you want to see full resolution photos or buy prints of any of the photos you see (except the a few photos of my friends and I), they are up on my portfolio for viewing. To see my best photos from this trip, use this link. To view all of the photos from my trip, use this link.


    This begins my trip. Pictures from along the way and the Mormon Church or The Church of Jesus Christ of Latter-Day Saints. I'm not a Mormon, but I am Christian. 

    我今天有一些在路上的照片和一个摩门教堂的照片。 我不是一个摩门教徒。 

    Sorry for the long wait for the pictures. I took around 4000 pictures on my trip. Due the large amount of pictures, and I have to pick out which ones to send to my blog, it took quite a while. Photoshop touching up also took quite some time, but I do have to admit, the scenery was so beautiful in some of the pictures, I didn't have to do anything. For most of the pictures I just adjusted the exposure (lighting) because the picture was too dark!

    I will also be doing something different for my blog posts. I'm going to be uploading around 520 pictures onto Blogger through the next several weeks. I can't do the thing I did on my past posts listing all the parts on each post because that will just take forever once I get a bunch of blog posts. Instead, for each post, I will have a link right under the intro and at the end of the blog post that links to the previous or the next part. This will make my job a lot easier.

    Beautiful Clouds. :)
    好看的云!:)

    Sunset.
    日落。
    Photography tip: Try lowering exposure to get a perfect sunset. :)

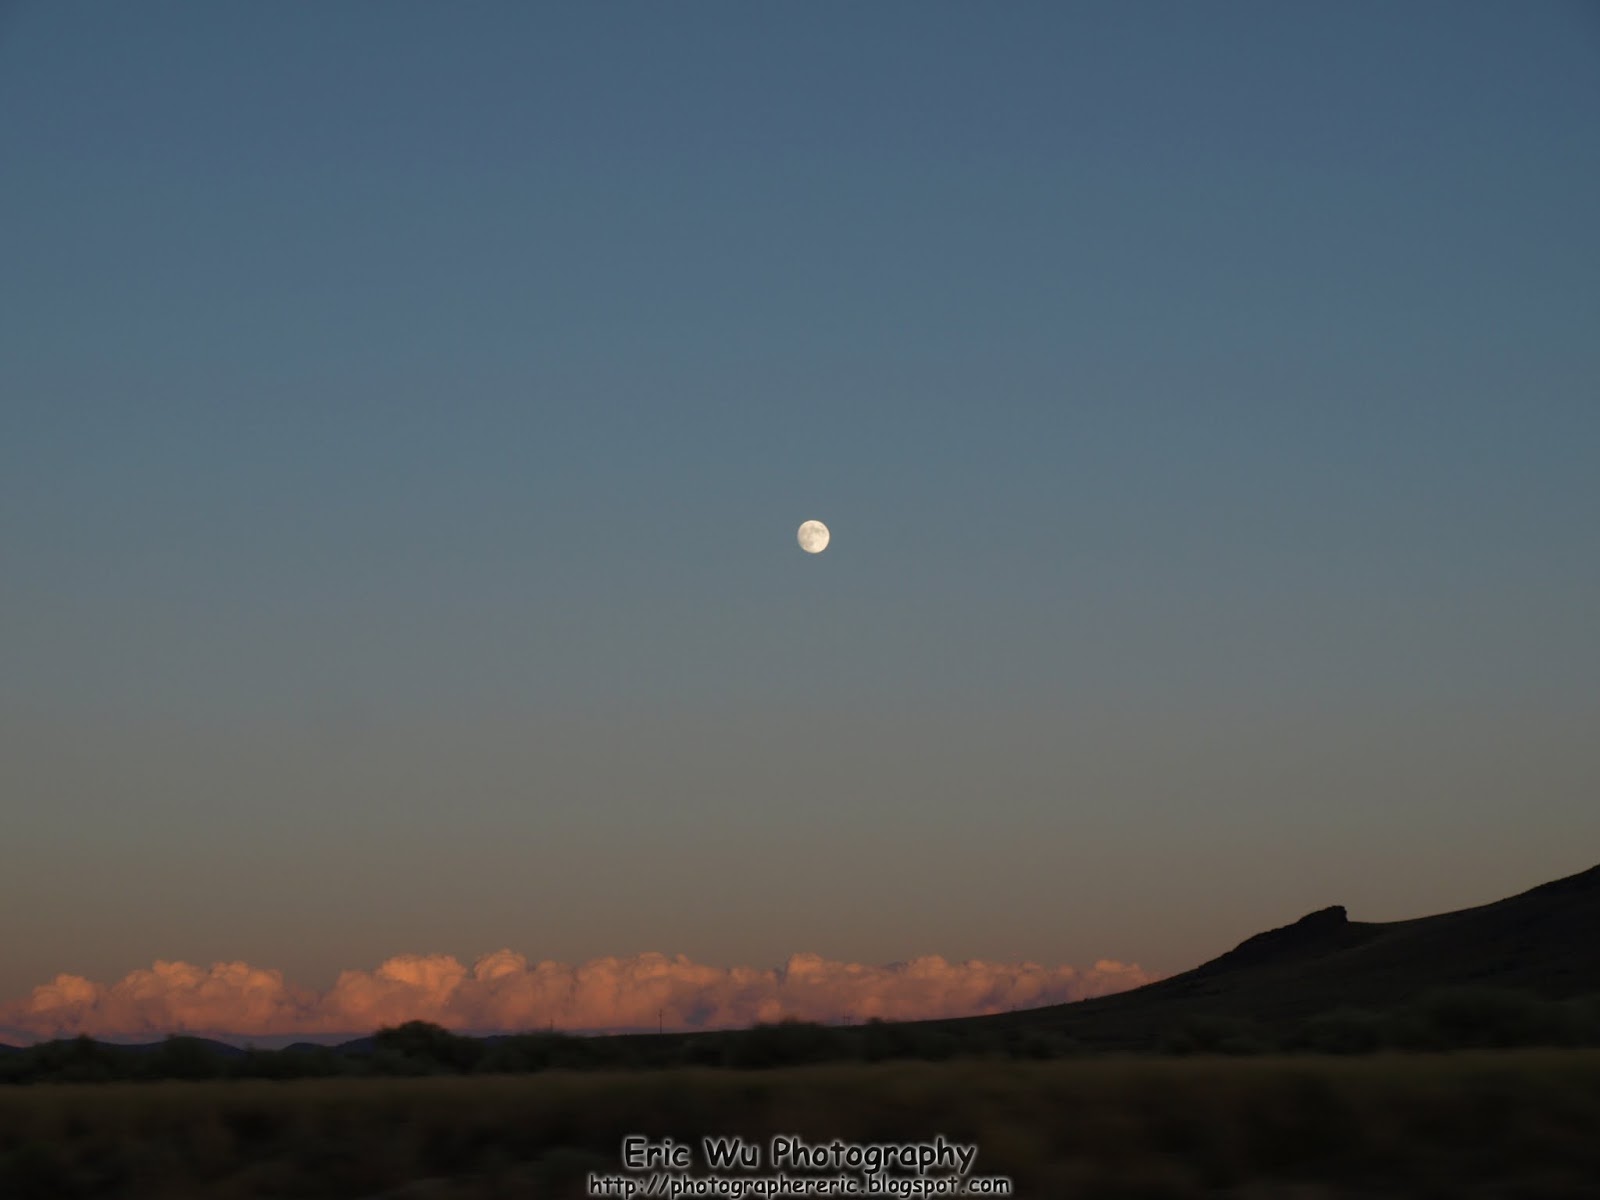
    The desert view and the moon. :) It's really nice!
    沙漠和月亮。

    The last 3 pictures are pictures of The Great Salt Lake. The other picture is a picture of something along the way.
    上面三个照片是盐湖城盐湖的照片。

    Pictures of Kennecott Copper Mine... The tire is the real size tire of 1 of the shovels. o_O It's really big!

    These are the pictures of the Mormon Church. The last picture is the picture of our savior, Jesus Christ. :)
    这些是在摩门教堂拍的照片。

    So that night, we drove to Yellowstone National Park. We stayed at Three Bears Inn at West Yellowstone I think. XD It's been a while. Like I said above, it's been a few weeks since I was back, can't remember so clearly... The pictures took a long time to process. Well next time, I'll be posting pictures of Yellowstone. :)


    那晚上我们就开到了黄石公园去了。下一个文章就是黄石公园的照片了!:)